Sunday, 7 January 2018

Ginger Cabbage Rice

Step by step procedure to prepare a simple lunch box recipe - Ginger Cabbage rice. No onion No Garlic rice recipe. This happens many times, as we wake up in the morning we just wonder, what we must cook for lunch box. And really, sometime we feel like, it should be quick and instant. Personally I do not prefer instant food, so I make the preparation quick and easy. Ginger Cabbage rice is one such simple rice recipe with just three main ingredients cabbage, ginger and rice. Though I am using very minimal ingredients(no masala items), it just taste really good. Precisely, the dish is mildly spicy with the great aroma of ginger.As I have mentioned, this rice recipe is a tasty and it is a comforting meal. Total time to cook would be just 20-25 min. So now we will see how to prepare quick, tasty and simple rice recipe - Ginger Cabbage Rice.

If you feel this recipe helpful, please share your feed back.

Preparation time: 5 min (excluding 30 min of soaking time)
Cooking time: 20 min
Serves: 1-2
Category: Variety rice
Recipe by Vidhya

Ingredients

Basmathi rice - 1/2 cup
Cabbage - 1 cup chopped tightly packed(I used 3/4 portion of a small cabbage)
Green peas - 1/4 cup (I used fresh peas)
Ginger - 2-3 inches
Green chilli - 1
Ghee - 1 tablespoon
Turmeric powder - 1/2 spoon
Mustard seeds - 1/2 spoon
Cumin seeds or Jeera - 1 spoon
Salt - as per your taste 

Method

  • Soak the basmathi rice for about at least 30 min.
  • Chop cabbage, ginger and chilli.
    Vidhya’s Veg Indian Recipes
    Vidhya’s Veg Indian Recipes
  • Take a pressure cooker, add a table spoon of ghee. You can also add butter or oil. When it is hot add mustard seeds. Once it splutters, add cumin seeds, ginger and green chilli. Stir it and careful not to burn cumin the seeds.
    Vidhya’s Veg Indian Recipes
  • Now add the green peas and give a stir.
    Vidhya’s Veg Indian Recipes
  • Add the chopped cabbage and stir it.
    Vidhya’s Veg Indian Recipes
  • Add the socked rice and add 1/2 spoon of turmeric powder.
    Vidhya’s Veg Indian Recipes
  • Add 1 cup water. I always use water in 1:2 ratio, i.e. 2 cup water for 1 cup rice.
  • Add salt, give a stir. Check for salt and close the cooker lid.
    Vidhya’s Veg Indian Recipes
  • Pressure cook for 15 min. Allow the pressure the release on its own. And now the Ginger Cabbage rice is ready for lunch box.
    Vidhya’s Veg Indian Recipes
  • Ginger Cabbage rice doesn't require any sides, as it is a flavourful rice recipe by itself though you can serve it with tomato sauce.
    Vidhya’s Veg Indian Recipes

Wednesday, 3 January 2018

Aloo Bhindi Masala

Step by step procedure to prepare a simple and tasty side-dish for roti/chapathi - Aloo Bhindi Masala.  Bhindi is my favourite vegetable, I am so delighted to post my first bhindi recipe. For this masala, we are shallow frying potato and okra (Ladies Finger) and putting it together with the spicy and creamy tomato and onion paste to make a delicious gravy. This masala goes as best sides for roti/chapathi/naan and also tastes good with rice. Now we will see how to prepare Aloo Bhindi Masala.

Preparation time: 10 min
Cooking time: 40 min
Serves: 2
Category: Side-dish
Recipe by Vidhya

Ingredients

To Fry

Bhindi/okra/ladies finger - 200 grams chopped
Aloo/Potato - 2-3 Medium sized chopped lengthwise
Oil - 2 tablespoon

To Blend

Tomato - 2 Medium sized
Onion - 1 large 
Garlic - 1 or 2 pods
Ginger - 1 inch
Green chilli - 1

Other Ingredients

Turmeric powder - a generous pinch
Chilli powder - 3/4 spoon
Garam masala powder - 1 spoon
Coriander powder - 1/2 spoon
Kasuri methi/dried fenugreek leaves - a pinch crushed
Salt - as per your taste

Method

  • In a kadai/pan, add a tablespoon of oil. When it is hot add the chopped okras. Fry it until the edges are slightly brown. Make sure the moisture is thoroughly removed and okras are fried nicely. It is not fried properly, it will make the gravy mushy. 
  • Remove the fried okras from kadai and keep it aside.
  • Now, in the same kadai, add a tablespoon of oil. When it is hot add chopped potatoes. Here, peel the potato's skin off before you chop it. you can chop it any pattern you want. 
  • Fry it until it becomes golden brown in the edges. Remove it and set aside.
  • In the meantime, you can chop the tomato, onion, ginger, chilli and garlic. Blend it to make a smooth paste using a blender.
  • Again, in the same kadai, add the tomato onion paste, add a pinch of turmeric powder and allow it to cook. When it starts boiling add garam masala, coriander powder. chilli powder and salt. Give a stir and cook for less than a minute.
  • Now add the fried bhindi and potato to the gravy and stir it gently. Bring the heat to low and cook for another 10 - 12 min, this allows the masala to get nicely blended with the vegetables.
  • Lastly add the crushed kasuri methi and give a stir. Remove it from hot plate.
  • Now the tasty Aloo Bhindi masala is ready to serve.
Note:
  • Wash the okra, spread it on a towel or kitchen cloth and remove the moisture completely before cutting it.
  • Do not add water to the gravy, especially after adding okra to it.

Sunday, 31 December 2017

Chocolate Vanilla Kalakand

Step by step procedure with clear pictures to explain the procedure to prepare delicious Chocolate Vanilla Kalakand. Basically kalakand is a sweet made with paneer and sweetened condensed milk. Here in my recipe, improvised the basic recipe with the flavour of coco powder and vanilla essence. This milk based dessert has a little bit chewy, soft, and granule texture. And I must mention this, the chewy texture of the sweet goes well with the chocolate and it doubles the taste of the basic kalakand. My recipe is double layered with flavourful vanilla milkcake as the first layer and irresistible chocolate milkcake as second layer and topped with dried nuts. The recipe is very straightforward with minimal ingredients and the procedure is also quite simple.
                        I have partitioned the procedure into three sections. First section explains on how to make our own paneer, second section explains about how to prepare vanilla milkcake and third section says how to prepare chocolate milkcake. Now scroll further see the procedure for Chocolate Vanilla Kalakand in detail.

Preparation time: 30 min
Cooking time: 40 min
Serves: 20 pieces
Category: Dessert/Sweet
Recipe by Vidhya

Ingredients

Milk - 2 litres
Lemon juice - 5-6 tablespoons, I used 2 medium sized lemon
Sweetened condensed milk - 400 grams
Butter - 2 table spoon
Coco powder - 2 1/2 tablespoon
Vanilla essence - 1 1/2 table spoon
Cashew and Almond - broken into peaces, a handful

Method

Paneer:

Firstly, we will see how to prepare paneer.
  • Boil 2 litres of milk, add 5 tablespoon of lemon juice to the boiling milk.
  • Reduce the heat and boil until the milk curdles.
  • when it is curdling, remove the milk pot from the hot plate and allow it to cool. If the milk is not curdling add more lemon juice. Remove the milk pot from heat only when it curdles. This entire process might take 20-30 min.
  • Place a thin kerchief over a vessel and transfer the curdled content to separate the solidified paneer. Now run it in cold water, which stops paneer from further cooking and allows it to remain soft and also removes the tint of lemon from paneer
  • Now squeeze and get rid of the remaining water content.
  • Paneer is now ready.

Vanilla MilkCake:

  • Take a thick bottomed kadai, add half of the paneer extracted, 200 grams of sweetened condensed milk and a tablespoon of butter. Mix well.
  • Now start heating in medium heat/flame, when it starts boiling add a table spoon of vanilla essence. Give a stir.
  • Now reduce the heat to low and cook for another 15 - 17 min. It should be thickened with some moisture. Careful, as it should not become hard.
  • Remove it from heat and transfer it to the greased plate. I used butter for greasing.

Chocolate MilkCake:

  • In a bowl, take the remaining paneer, add 2 1/2 tablespoon of coco powder, 200 grams of sweetened condensed milk and a tablespoon of butter. Mix well with no lumps. I used the same kadai which I used to prepare vanilla portion.
  • Now transfer it to the kadai, place the kadai in the hot plate. Heat should be medium.
  • When it is boiling add 1/2 spoon vanilla essence. Mix it well.
  • Stir and cook for another 15 - 17 min. Again the same procedure as vanilla portion. The content should be thickened with some moisture. Again careful, as it should not become hard.
  • When it is in the perfect consistency, transfer it to the plate and spread it over the vanilla milkcake. Sprinkle the broken nuts and press it gently. Keep it in the fridge for 2-3 hours and Cut them into peaces.
Note:
  • I haven't added sugar, as the sweetness from sweetened condensed milk was enough for us. You can taste it and add sugar if you want.
  • If you are unable to spread it with spoon, use your hands and spread it evenly. 
  • I like the milkcake chewy. If you want to harden it a little bit to get burfy like texture, stir and cook for some more time.
  • You can use any dry fruits/nuts of you choice.

Wednesday, 27 December 2017

Instant Moong Dal Dosa

Step by step procedure to prepare Instant Moong Dal Dosa. This is a very crispy, tasty and easy to prepare dosa recipe. The recipe doesn't require any overnight process as we do to prepare our traditional dosa. I usually prepare for this dosa dinner, but it is suppose to be a filling and healthy breakfast too. And this instant dosa helps me a lot when the weather is too cold to ferment my idli/dosa batter. As I said I prefer this dosa for dinner, but if you want to make it for breakfast, you can prepare the batter and keep it in fridge and use it in the next morning for preparing dosa. For preparing a tasty and instant dosa scroll down and see the procedure.
Vidhya's Veg Indian Recipes

Preparation time: 10 min + 4 hours soaking time
Cooking time: 3 min per dosa
Serves: 7-8 dosa
Category: Dosa
Recipe by Vidhya

Ingredients

To Grind

Moong dal/Pasi parrupu - 1 cup/250 grams
Rice flake/Flattened rice/Aval - 2 table spoon
Green chilli - 3 or as per your taste
Ginger - 1 inch
Hing/Asafoetida - 1 generous pinch

Add to dosa batter

Onion - 1 Medium sized finely chopped
Coriander leaves - half cup, loosely packed 
Oil - for making dosa

Method

  • Wash and soak 1 cup of Moong dal and Rice flake for 4 hours.
    Vidhya's Veg Indian Recipes
  • After soaking it for 4 hours, strain the water and transfer it to a blender. Add Green chilli, Ginger, Hing and Salt.
    Vidhya's Veg Indian Recipes
  • Add water and blend it to make a smooth paste.
    Vidhya's Veg Indian Recipes
  • In a pan, add a spoon of oil and fry the finely chopped onion until the raw smell goes off. This step is optional, you can also add onion directly to the batter. 
    Vidhya's Veg Indian Recipes
  • Now add the fried/raw onion into batter. Add the chopped coriander and a table spoon of jeera.
    Vidhya's Veg Indian Recipes
  • Prepare batter in dosa consistency. Check for salt. Set the batter for at least 30-40 min before preparing dosa. 
    Vidhya's Veg Indian Recipes
  • Prepare dosa in your normal procedure. Serve hot Moong Dal Dosa with any chutney or sambar.
    Vidhya's Veg Indian Recipes
Note:
  • You can add onion raw or fried and it is totally your choice, as few may not like raw onion.
  • If you are preparing for breakfast, I suggest, you can prepare the batter in the previous night and keep the batter in the fridge. In the morning you can add onion and coriander and set it for 30-40 min before preparing dosa.

Sunday, 24 December 2017

Mango Halwa

Step by step procedure to prepare Mango Halwa. Here you can see very clear procedure, easy steps and very minimal ingredients to prepare a sweet recipe, Mango Halwa. No artificial essence used but just mango fresh juice.
                  Mango Halwa is really a mouth-watering dessert. When I prepared it first time, it was a super hit. Very soft, smooth, chewy and it carries the original taste and colour of mango and it just tempting. Though it is time consuming, you will end up feeling satisfied of serving a home made dessert to your family and to yourself. Now we will see the detailed procedure to prepare Mango Halwa.     

Preparation time: 10 min
Cooking time: 1 hr
Serves: 35 pieces
Category: Dessert/Sweet
Recipe by Vidhya

Ingredients

Mango juice fresh - 1 1/4 cup
All purpose flour/Maidha - 1/2 cup
Sugar - 1 1/4 cup
Powdered cardamom - 1 spoon
Cashew - 15 pieces, broken
Almond/Badam - 15 pieces, broken
Ghee - 1/4 cup + 4 table spoon

Method

  • I blended 2 mangoes and it yielded 1 1/4 cup of mango juice.
  • Take a bowl, add mango juice and add 1/2 cup of maidha/all purpose flour to it. Mix it nicely with no lumps of maidha.
  • Now take a thick bottomed kadai, add 1/4 cup of ghee. When it becomes hot add the mixture of mango juice and maidha.
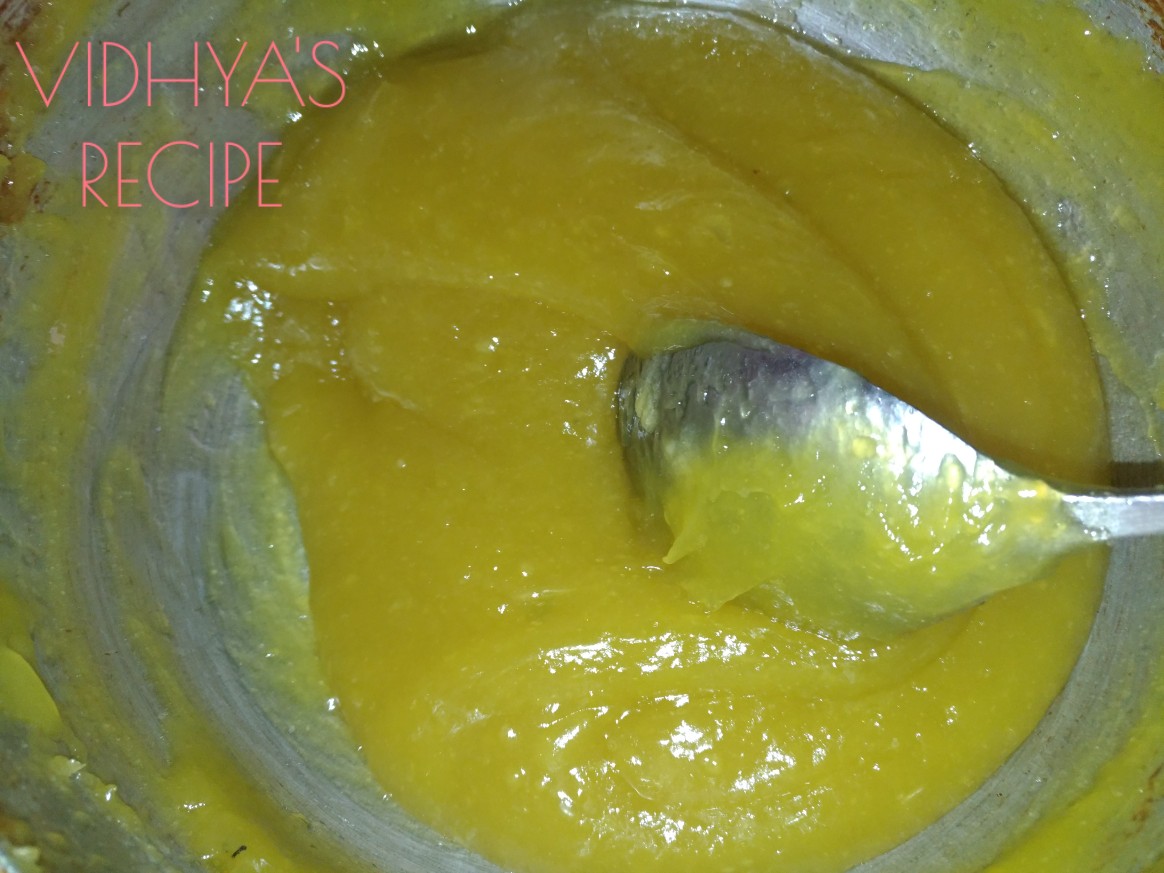
  • Mix it nicely, when it starts boiling add 1 1/4 cup of sugar and mix it well.
  • Allow it to cook and stir it every 2-3 min. Add ghee in between. I added 4 table spoon of ghee. Cook in medium heat.
  • Now you need a real patience, as it may take 40-45 min roughly to get the right halwa consistency.  Again continue cooking in medium heat. When the halwa starts leaving the pan i.e. when halwa no longer sticks to the kadai - add powdered cardamom, broken cashews and almonds.
  • Continue stirring for 10 min in medium heat. Now the halwa will leave the sides of the pan and sticks to laddle. When you trying to stir the halwa it should come out forming like a ball -  without sticking to edge of the pan. The entire process of cooking might take roughly 1 hour.
  • Keep a serving plate ready greased with ghee. Transfer the halwa to the greased plate and spread it evenly. Leave it for an hour in the plate. When it cools down, cut them into pieces.
  • Enjoy the artificial colour free but the real taste of mango, in the home made Mango Halwa.
Note:
  • I used 1 1/4 cup of sugar. Adjust the sugar as per your taste.
  • You can use any dry fruit/nuts to garnish your halwa.
  • A tip, lightly grease the laddle with ghee while spreading the halwa on serving plate. It helps avoiding sticking of halwa to the laddle and gives a smooth spreading.